[cocos2d]CCSprite#01

CCSpriteについて#01

ファイルから

CCSprite*sp=[CCSprite spriteWithFile:@"image.png"];

中心点を設定する。デフォルトは(0.5,0.5)になっています。

[sp setAnchorPoint:ccp(0.0,0.0)];

画像の十字のところが中心点。ここを中心に拡大したり、回転したりします。


  • [sp setAnchorPoint:ccp(0.0,0.0)];

  • [sp setAnchorPoint:ccp(0.5,0.5)];

  • [sp setAnchorPoint:ccp(1.0,1.0)];

参考サイト
CCSprite Class Reference

[Xcode]アプリ名のローカライズ

よく忘れるのでメモ。

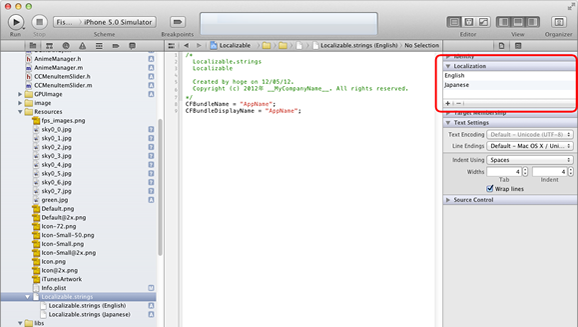
1. Resourceなどを右クリックして「New File」
2. Strings Fileを選択
3. ファイル名をInfoPlist.stringsに
4. InfoPlist.stringsを選択して右カラムのLocalizationの「+」で言語を追加
5. 出来たInfoPlist.strings(English)を選択し下記を記述

CFBundleName = "hoge";
CFBundleDisplayName = "hoge";

参考画像

[objective-c]NSUserDefaults

NSUserDefaultsは一時的に情報を記録出来るクラスです。
アプリをアップデートしたりすると消えます。多分。FlashのSharedObjectのようなものです。

使い方

-(void)saveData{
    NSUserDefaults *me=[NSUserDefaults standardUserDefaults];
    [me setFloat:prop1 forKey:@"prop1"];
    [me setFloat:prop2 forKey:@"prop2"];
    [me setFloat:prop3 forKey:@"prop3"];
    [me setFloat:prop4 forKey:@"prop4"];
    [me setFloat:prop5 forKey:@"prop5"];
    [me synchronize];
}
-(void)loadData{
    NSUserDefaults *me=[NSUserDefaults standardUserDefaults];
    NSArray*obj=[NSArray arrayWithObjects:@"0.05",@"-0.5",@"0.4",@"0.1",@"1.0", nil];//各変数の初期値
    NSArray*key=[NSArray arrayWithObjects:@"prop1",@"prop2",@"prop3",@"prop4",@"prop5", nil];
    NSDictionary *appDefaults = [NSDictionary dictionaryWithObjects:obj forKeys:key];
    [me registerDefaults:appDefaults];
    
    prop1=[me floatForKey:@"prop1"];
    prop2=[me floatForKey:@"prop2"];
    prop3=[me floatForKey:@"prop3"];
    prop4=[me floatForKey:@"prop4"];
    prop5=[me floatForKey:@"prop5"];
}
-(void)removeData{
    NSUserDefaults *me=[NSUserDefaults standardUserDefaults];
    [me removeObjectForKey:@"prop1"];
    [me removeObjectForKey:@"prop2"];
    [me removeObjectForKey:@"prop3"];
    [me removeObjectForKey:@"prop4"];
    [me removeObjectForKey:@"prop5"];
    [me synchronize];
}

initメソッドあたりでloadDataする。
saveDataで保存して、removeDataで消す。簡単。

[iPhone Apps]FisheyePhoto(魚眼フォト)

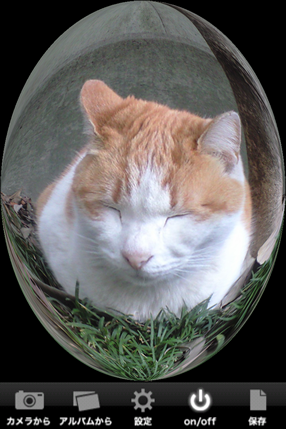
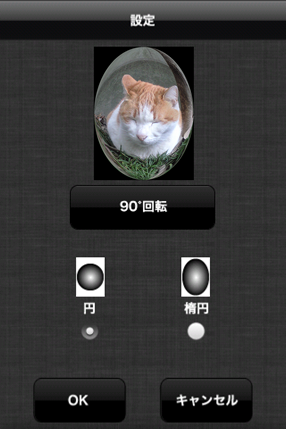
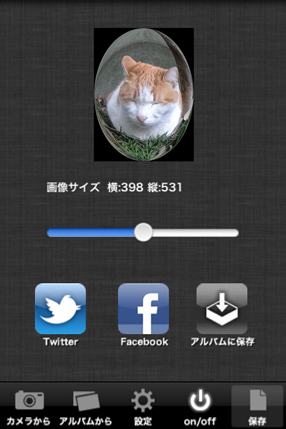
iPhoneアプリ「魚眼フォト」をリリースしました。
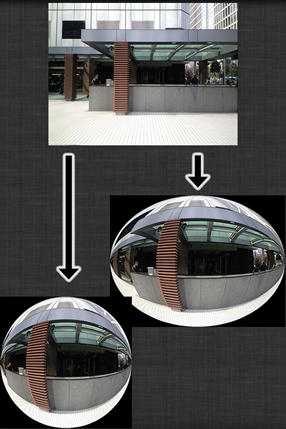
魚眼フォトは写真を魚眼レンズで撮ったような写真に加工するアプリです。
犬や猫の写真を使うと一味違ったかわいさを出すことが出来ます。
Twitter,Facebookに対応しており、作った写真をすぐにアップロードすることが出来ます。

FisheyePhoto is photo retouch App.
Enable to convert the photo that look like they were taken with fisheye lens photos.
You can upload photos to Twitter,Facebook.


魚眼フォト
魚眼フォト


FisheyePhoto

魚眼フォト魚眼フォト

魚眼フォト魚眼フォト

[cocos2d]シーンの切り替えで使用メモリが増えていく

iPhone Game「社畜!ナカムラくん」の制作で解決したのでメモ。

deallocメソッドでreleaseしていても
cocos2dだとreplaceSceneを繰り返すと使用メモリが増えていく。
下記コードをdeallocメソッドに入れると解決。

[CCAnimationCache purgeSharedAnimationCache];
[[CCTextureCache sharedTextureCache] removeAllTextures];

cocos2dが画像やらアニメやらをキャッシュしてる。

[cocos2d]アニメーション

iPhone Game「社畜!ナカムラくん」で実践していた方法。
おおまかな作業の流れは下記。
1. Flashでアニメーションを制作
2. pngシーケンスで書き出す
3. Zwoptex(有料)で一枚のpngに出力
4. CCSpriteに表示

1. Flashでアニメーションを制作
30fpsでアニメーションを作ります
作ったものがこれ

2. pngシーケンスで書き出す
Flashにて「ファイル」→「書き出し」→「ムービーの書き出し」
でフォーマットを「pngシーケンス」にして任意のフォルダへ書き出す。

3. Zwoptex(有料)で一枚のpngに出力
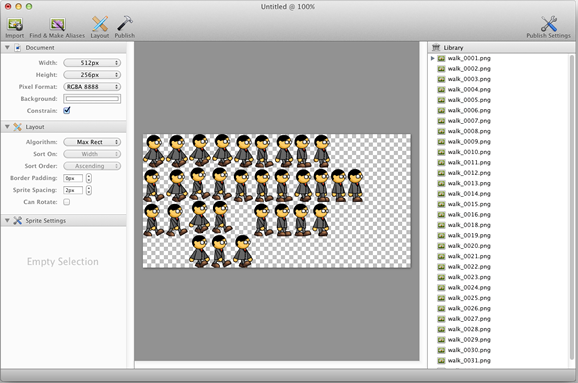
Zwoptexで一枚にしてplistファイルを書き出します。
Zwoptexはcocos2dで使用するSpriteSheetを書き出すツールです。
公式サイトはこちらZwoptex
15ドルでMacAppStoreからも買えます。
・Zwoptexを起動
・「File」→[New]
・pngシーケンスをドロップ
・「Layout」クリック
・「Publish」
で一枚pngとplistファイルが書き出されます。
4. CCSpriteに表示
XcodeのResourceフォルダあたりに一枚pngとplistファイルをドロップします。
そして下記コードからCCSpriteに表示します。

-(NSString*)pzero:(int)a keta:(int)keta{
    NSString *b=[NSString stringWithFormat:@"%d",a];
    while ([b length]=enno; a--) {
            NSString* file=[NSString stringWithFormat:@"%@%@.png",frame,[self pzero:a keta:4]];
            CCSpriteFrameCache* frameCache=[CCSpriteFrameCache sharedSpriteFrameCache];
            CCSpriteFrame* sframe=[frameCache spriteFrameByName:file];
            [frames addObject:sframe];
        }
    }
    return [[[CCAnimation alloc]initWithFrames:frames delay:delay]autorelease];
}
-(void)initAnimeFrames:(NSString*)key animename:(NSString*)animename stno:(int)stno enno:(int)enno delay:(float)delay{
    CCAnimation* ani=[[CCAnimationCache sharedAnimationCache] animationByName:animename];
    if(ani!=nil)return;
    
    CCAnimation* anim = [self animationWithFrame:key stno:stno enno:enno delay:delay];
    [[CCAnimationCache sharedAnimationCache] addAnimation:anim name:animename];
}
-(void)initPlist:(NSString*)plistkey{
    CCSpriteFrameCache* frameCache = [CCSpriteFrameCache sharedSpriteFrameCache];
    NSString *s=[NSString stringWithFormat:@"%@.plist",plistkey];
	[frameCache addSpriteFramesWithFile:s];
}
-(void)initAnime{
    [self initPlist:@"walk"];
    [self initAnimeFrames:@"walk" animename:@"walk" stno:1 enno:33 delay:0.05f];
}
-(id)init{
    self=[super init];
    if (self) {
        [self initAnime];
    }
    return self;
}


-(CCAnimation*)getAnime:(NSString*)key{
    return [[CCAnimationCache sharedAnimationCache] animationByName:key];
}
-(void)setAnime:(CCSprite*)sp animename:(NSString*)animename repeat:(BOOL)repeat{
    NSString* n=animename;
    CCAnimation* anim =[self getAnime:n];
    if(anim==nil){
        return;
    }
    CCAnimate* animate=[CCAnimate actionWithAnimation:anim];
    if (repeat) {
        CCRepeatForever* ccrepeat = [CCRepeatForever actionWithAction:animate];
        [sp runAction:ccrepeat];
        [sp setDisplayFrameWithAnimationName:n index:0];
    }else{
        id act=[CCSequence actions:animate, nil];
        [sp runAction:act];
        [sp setDisplayFrameWithAnimationName:n index:0];
    }
}

CCSpriteに表示するときはこう

CCSprite*sp=[[CCSprite alloc]init];
[anime setAnime:sp animename:@"walk" repeat:YES];
[mynode addChild:sp z:22];
[self initAnimeFrames:@"walk" animename:@"walk" stno:1 enno:33 delay:0.05f];

このコードのdelayの値が1フレームの表示時間なので早くするなら小さい値を
遅くするなら大きい値を。

[iPhone Apps, Android Apps]チルトシフトフォト (TiltShiftPhoto)

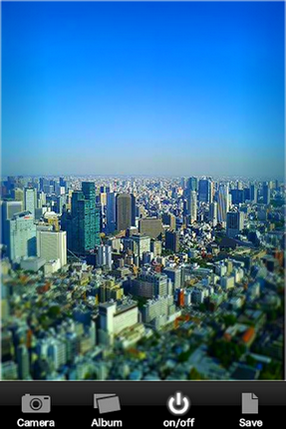
iPhone Apps「チルトシフトフォト」をリリースしました。
Androidバージョンもあります。「チルトシフトフォト

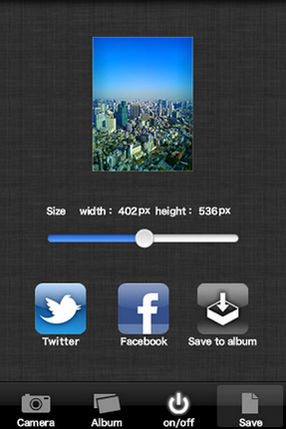
チルトシフトフォトは写真をチルトシフトレンズで撮ったミニチュアのような写真に加工するアプリです。
Twitter,Facebookに対応しており、作った写真をすぐにアップロードすることが出来ます。

TiltShiftPhoto is photo retouch App.
Enable to convert the photo that look like they were taken with tilt shift lens photos.
You can upload photos to Twitter,Facebook.